Your shoulders carry more than just physical weight. They hold the tension of long days, the stress of responsibilities, and the strain of repetitive movements like typing, lifting, or even just sitting with poor posture. Over time, this tension builds up, leaving your shoulders feeling tight, stiff, and sometimes even painful. That’s where yoga comes in—not as a quick fix, but as a gentle, consistent practice to restore mobility, strength, and balance.
A yoga session focused on the shoulders is not just about stretching. It’s about creating space, improving posture, and reconnecting with your body in a mindful way. Whether you’re dealing with tightness, discomfort, or simply want to improve flexibility, shoulder-focused yoga can make a powerful difference.
Begin by finding a comfortable seated position. Let your spine grow tall, your chest open, and your shoulders relax away from your ears. Close your eyes for a moment and take a few deep breaths. Inhale deeply through your nose, filling your lungs completely. Exhale slowly, allowing any tension to melt away. This is your starting point—calm, grounded, and present.
Start with gentle shoulder rolls. Lift your shoulders up toward your ears, roll them back, and then let them drop down. Move slowly and intentionally. Repeat this several times, and then reverse the direction. This simple movement helps to increase circulation and awaken the muscles around the shoulder joint.
Next, move into neck stretches. Gently tilt your head to one side, bringing your ear toward your shoulder. You should feel a stretch along the opposite side of your neck. Keep your shoulders relaxed as you breathe into the stretch. Switch sides after a few breaths. This releases tension that often travels from the shoulders into the neck.
From here, extend your arms out in front of you and interlace your fingers. Turn your palms outward and press your hands away from your body while rounding your upper back. This movement stretches the upper shoulders and creates space between the shoulder blades. Take a few slow breaths here, feeling the gentle expansion.
Now, release your hands and reach your arms overhead. Interlace your fingers again and turn your palms upward. Lift your arms toward the ceiling, lengthening through your spine. Be mindful not to shrug your shoulders—keep them relaxed as you reach. This helps improve shoulder flexibility while maintaining proper alignment.
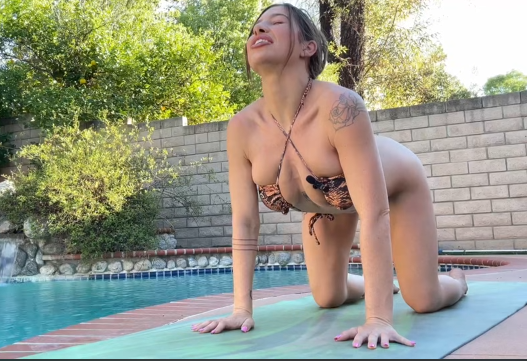
Transition into a tabletop position on your hands and knees. Align your wrists under your shoulders and your knees under your hips. From here, begin with gentle shoulder pulses. Without bending your elbows, shift your body slightly forward and back. This helps to strengthen the shoulder joint while increasing awareness and control.
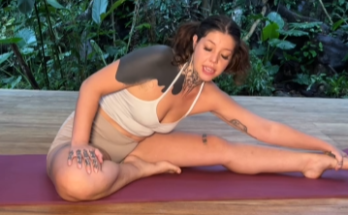
Next, move into Thread the Needle pose. Slide your right arm underneath your left arm, bringing your shoulder and cheek to the mat. This creates a deep stretch in the back of the shoulder and upper back. Keep your hips stable and your breath steady. After several breaths, switch sides.
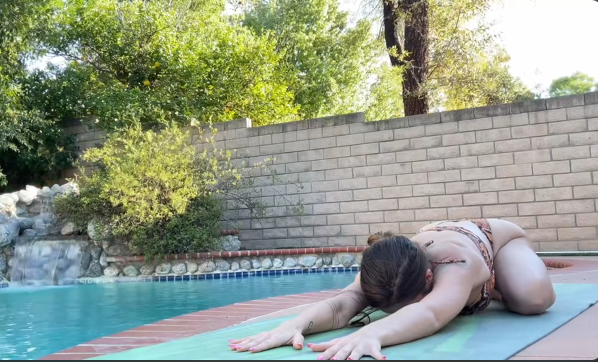
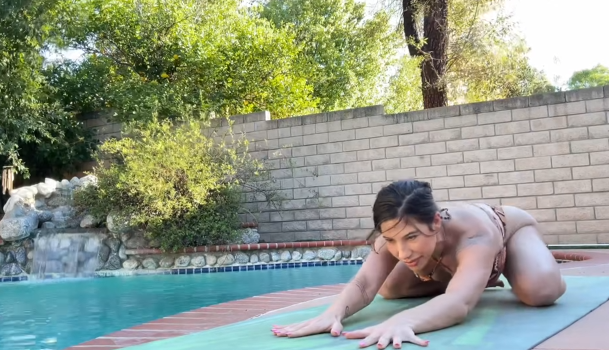
Return to tabletop and prepare for Puppy Pose. Walk your hands forward while keeping your hips stacked over your knees. Lower your chest toward the mat, allowing your forehead or chin to rest down. This is a beautiful stretch for the shoulders, chest, and upper spine. Breathe deeply and let gravity gently open your shoulders.
From here, transition into Downward Facing Dog. Lift your hips up and back, forming an inverted “V” shape with your body. In this pose, focus on pressing your hands firmly into the mat and externally rotating your upper arms. This helps to stabilize and strengthen the shoulders. You can gently bend one knee at a time, pedaling your feet to release tension throughout the body.
Now, slowly lower down into a prone position on your belly. Extend your arms out to the sides like a “T.” Roll onto one side, using your opposite hand to support you. This stretch targets the front of the shoulder and chest, areas that often become tight from hunching forward. Take your time and breathe deeply before switching sides.
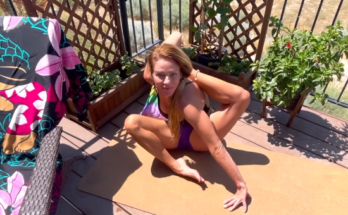
Come back to a seated position for a cross-body shoulder stretch. Bring your right arm across your chest and use your left hand to gently press it closer. Keep your shoulders relaxed and avoid pulling too hard. This stretch is simple but effective in releasing tension in the outer shoulder.
Next, try Eagle Arms. Extend your arms forward, cross one arm over the other, and bend your elbows so your palms come together. Lift your elbows slightly and feel the stretch across your upper back and shoulders. This pose is especially helpful for relieving tightness between the shoulder blades.
As you continue your practice, remember that the shoulders are complex joints. They require both mobility and stability. It’s not just about stretching deeply but also about building strength and awareness. Move slowly, listen to your body, and avoid forcing any position.
Finish your practice by lying down on your back in a resting position. Let your arms rest comfortably by your sides, palms facing upward. Close your eyes and take a few moments to observe how your shoulders feel. Notice any changes—perhaps a sense of lightness, openness, or ease.
This final relaxation is just as important as the movement. It allows your body to absorb the benefits of the practice and reset your nervous system.
Yoga for shoulders is something you can return to again and again. With consistent practice, you may notice improved posture, reduced tension, and greater freedom of movement. Everyday tasks may feel easier, and the discomfort you once carried may begin to fade.
Most importantly, this practice is a reminder to care for your body in a mindful and intentional way. Your shoulders do so much for you—they deserve your attention and care.
So take a deep breath, roll your shoulders back, and carry this sense of openness with you into the rest of your day.